
So earlier this week I tried my hand at cheesemaking, using the mozarella kit that I purchased from cheesemaking.com. We bought a gallon of milk (we used 2%) and got to work. The description of the kit had said that it would help you make about a pound of mozarella and some ricotta cheese as well, all in about a half hour.
Yeah, well, don't believe everything they tell ya. ;)
First of all, it takes quite awhile to heat a gallon of milk to 88 degrees without scorching it on the bottom. So, my children, who had previously been set up to help me make this cheese and observe this scientific wonder :) gradually faded away to the back yard while I stirred, and stirred, and stirred a slowly-heating pot of milk. :)
Eventually the milk got warm enough and we moved on to the stage where you add another thing (I can't remember if it's the rennet that you add now, or the citric acid....one gets added at the beginning, one at the point where the heating is done) and then wait for the milk to firm up into curds and whey. (Hellooooooo Little Miss Muffet!) This took about 15 minutes for us (or, more time for uninspired children to play on the swingset) and then I got into the highlight of the experience, which was trying to *separate* the curds from the whey. Also known as the "Why did I think this was a good idea and why did I think it would be fun?" stage.
I used a slotted spoon to try to fish out the curds, which are like milky, slippery jello pieces floating in a yellowy sea of liquid (whey). As you fish out the curds, you get a lot of whey with it. According to what I learned from watching the cheesemaking DVD, the curds are quite fragile, so if you do not treat them with tender loving care they will break apart and end up being too small to corral into your cheesemaking process.
Again, this portion of the process is not on that exactly keeps children on the edge of their seats. They walked in, saw me fishing out curds, pronounced it "looks gross!" and went back outside. Who could blame them? I was up to my elbows attempting to fish out curds for probably 20 minutes (which feels like a lot longer when you're doing it, let me tell ya!).
I had a lot of trouble trying to pour off that pesky whey. You'd think it would be a no-brainer, but for me, it wasn't. I think that by the time I finished I learned that I could have worried less about the whey and just moved on to the next step without trying to be too thorough about it.
Eventually I got annoyed enough with the whole curds-and-whey thing that I did something that they tell you not do to on the DVD, which is to pour the rest of the curds and whey into a colander that was inside a bowl. Apparently some curds are just too fragile to even be poured this way, but I felt like it was either that, or stand there all day fishing for my long-awaited curds, or waste a whole lot of material that was supposed to be turning into cheese. I was willing to throw cheesemaking caution to the wind and take my chances.
I got a good amount of curds from the colander, and then I used the cheese cloth to line the colander and poured the whey through it again, so that I could catch all of those teeny-weeny pieces of curd that I had traumatized thus far in the process. That worked out fine and I probably got another cup and a half of curds that way.
After you get your curds together you microwave them for about a minute, then do some kneading or stirring, and this is where the curds start sticking together and it becomes a lot easier to pour of the whey. (Next time I'll worry less about the whey and just get on to microwaving.) You microwave a little, add in your cheese salt, then stir and knead and stretch a little, microwave again, etc. until you get to the point where the whey is gone, and your cheese is now looking like it should. By the end it is shiny and stretchy and doesn't break apart even when you stretch it for a long way. At that point I started feeling pretty excited. "I made cheese! Yessirree I did!"
When your cheese is done, you plunge it into icy cold water to cool. One tip that I thought was fun was to stretch the cheese into lines (log shapes) before cooling it, and you end up with string cheese. I also did some twists of cheese as well. And the rest I just left in a circle.
It tastes very good, just like it should. Nothing weird about it, nothing objectionable in any way.
It took me about an hour and a half, and that didn't even include ricotta, which I found out was not something that could be done with the leftover whey as I thought it would, but required a whole other gallon of milk. And, frankly, I just didn't care at that point. :)
I did save all of the whey by pouring it right back into the gallon jug. I was amazed to see that there was about 3/4 of a gallon of whey. Seems like a lot of waste to me. Apparently you can use this in any recipe that needs sour milk or buttermilk, and it can be used when making baked goods, pancakes, etc. Of course I made pancakes the other day and forgot to use the whey, but am thinking of making a big batch of pancakes for the freezer, so I can use some of it up then.
Overall, it was a learning experience, and although it didn't go super-easy or super-fast, I feel like I will enjoy trying my hand at cheesemaking again. It would be a decent activity to do while doing some other kitchen things and chatting with my husband. There were some really interesting ideas and suggestions for things you can do with the cheese where you combine the cheese with herbs and so on that seemed like they might be really yummy. (and in true "If You Give a Moose a Muffin" tradition, this made me think that I really, really need to get started on growing my own herbs....ha ha!!)
I don't consider cheese (or milk) to be all that healthy, but have found that it is something we just aren't ready to entirely part with yet. Now that I know about the various chemicals that are added to cheeses that are sold in the store (brick cheese as well as shredded) I am more motivated to try to get better at this cheesemaking thing and see if I can fit this into our regular life.
The DVD (included with the kit, as well as a very nice book with lots of cheese recipes and instructions) of the cheesemaking was very interesting and I learned about many cheeses that I had not heard of or been familiar with. I think that the DVD is a lot more interesting for children since it edits out all of the boring wait time involved, which is a whole lot of it.
I did get a hard cheese kit as well, so that I can make my own cheddar, colby, and so on. I think I will need a cheese press to get into that, so haven't tried it out yet.
Each kit has enough ingredients to make many pounds of cheese (I think between the two kits I have enough material to make 100 pounds of cheese!) so when I look at it like that, it was a decent investment. I plan to keep my radar up for bargain organic milk ever time I pass by Kroger.
I did notice that they sell the Yogotherm at cheesemaking.com, and they also have *kefir* which I mentioned a few weeks ago as having been on my radar. Apparently in the yogotherm you can make cream cheese, sour cream, yogurt, buttermilk, kefir, and a bunch of other fancy-shmancy sounding soft cheese that I am not cultured enough (ha ha punny!) to be familiar with. So, I will have to think about whether or not it would be worth it to me to try that out as well. ($69.95---I'll have to be pretty sure, won't I?)
I do think that cheesemaking has the potential to be a fun activity and to provide for some creativity that could be a fun thing to dazzle people with at the meal table. Loving to be an enigma as much as I do, adding "I make homemade cheese" to the list is quite appealing, I must say. :) (even cooler than "I make homemade bread and grind my own wheat"!)
My Bread Recipe
Wednesday, April 16, 2008
Labels:
Recipes
I finally had time to bake bread properly on Saturday morning, and I thought I would share my recipe with you. (Plus, if I go a long, long time before making bread again sometime in the future, it would be handy to have the recipe here to refer to. :) )
Supermom's Family-Favorite Honey Whole Wheat Bread
In Bosch mixer combine:
6 cups warm milk (not too hot! You don't want to kill the yeast) (also, if you're low in milk, you can use part milk and part water)
6 Tablespoons baking yeast
3 Tablespoons lecithin
1-and-a-half sticks of butter, sliced
1 cup of honey
1.5 Tablespoons sea salt
Plus freshly ground whole wheat flour. (I use a Whisper Mill) Basically, I grind 8 cups of wheat into flour and pour all of that into the Bosch. Then I grind 8 more cups of wheat, but just add it roughly by the cupful as the mixer goes round and round. You only want to add enough flour to get to the point where the dough comes away from the sides of the mixer bowl cleanly. (the extra flour is used making pancake mix)
Leave the cover on and let the mixer do it's thing for 10 minutes. (electronic kneading!!)
Though this recipe was originally given to me for 6 loaves, I find that it works better for us to make it into 5. So, just grab blobs of dough and try to distribute it evenly between 5 loaf pans that have been sprayed with no-stick spray. Lovingly pat the dough into shape, and then cover all of it with a tea towel and leave it alone to rise for a half hour.
I leave the loaves on the stove top for the rising, because about 15 minutes into the rise time I start pre-heating the oven. I think that the heat that radiates up to the stove top helps it rise better.
Preheat the oven to 325 or so. (350 is too much, but if you have a fancy-shmancy oven that allows you to be even more precise than 25-degree increments, I would not be surprised if you find that 330 or 340 degrees works even better).
After the half hour of rising you just need to uncover your bread and pop it into your oven. Bake for 22 minutes. (Seriously. Not 20. Not 25. 22. Or at least, that's what brings about bread perfection in MY oven. Yours may be different.)
My family loves this bread so much that I try to plan for it to come out of the oven about 15 minutes or so before lunch time. They will gladly eat some fresh bread with butter, honey, jam, or peanut butter for lunch. :)
Cheese--I'm gonna learn how to make it myself
Tuesday, April 15, 2008
Labels:
Food,
No MSG,
Supermom Says
I took the plunge! Now that I know about the baddy-cat ingredients added to pre-shredded cheese, PLUS the fact that I now regularly find Horizons organic milk marked down to $2.59 a gallon at Kroger, I decided to go ahead and buy some stuff so I can learn how to make my own cheese. I got stuff to make mozzarella and ricotta, as well as hard cheeses like colby jack and cheddar. I will be sure to let you know how it goes! (I bought my cheese-making goodies here, in case you want to check it out.)
Ever optimistic,
Supermom
Ever optimistic,
Supermom
No-MSG Victory of the Day
Monday, April 14, 2008
Labels:
Food,
No MSG,
Supermom Says
Learning about all of the covert ways that MSG and it's baddy cat cousin Glutamate make it's way into our food has sure been a bummer. One of the biggest disappointments was my discovery that my feel-good "No MSG added" chicken broth powder still had the junk in it. Rats! What's a girl to do??
I can be somewhat challenging to find a chicken broth substitute that doesn't have MSG or glutamates in it. At Walmart all I found had problem ingredients in it. But at Kroger I hit the jackpot with Imagine brand Organic Free Range Chicken Broth. I bought the low sodium version (which still has a lot, but it's better than the regular). You'll have to check the ingredients at your own store, because a lot of products are manufactured at more than one place, so they might not be 100% the same everywhere. (Feel free to leave a comment and let us know)
I wanted to make my healthier version of The Pioneer Woman's Chicken Spaghetti Casserole, but to do that I would have to make my healthy version of canned cream soups. So....I had to get creative.
The recipe I used to use features the "no msg added" chicken broth powder. I wanted to experiment with the organic broth instead. So...here's what I came up with:
Melt one and a half sticks of real butter on medium-low heat.
Once melted, add 3/4 cup whole wheat flour. Stir with whisk until well blended, and let it cook a bit until it gets bubbly.
Then I added two cups of the organic chicken broth, plus four cups of Horizons whole milk that had been pre-heated.
After that I just stirred with the whisk for about 20 minutes while reading a magazine and chatting with my daughter.
It came out great!
From there I made my version of the casserole. Here's what I did:
Supermom's Healthier Chicken Spaghetti
3 cups cooked chicken--cubed or shredded (I always cook my chicken ahead of time in the crock pot. Just buy a big bunch of chicken breasts on sale and throw 'em all in the crock on low in the morning, all done by evening. Refrigerate or freeze.)
2 cups of shredded sharp cheddar cheese (I learned that there are glutamates in the pre-shredded cheese, so once I use up the supply I have on hand, I am either going to start buying bricks of cheese and shredding them with my food processor, or learning to make my own. Haven't crossed that bridge yet.)
half a sweet onion--chopped (throw it in the food processor with the chicken. Easy!)
about a pound of whole wheat spaghetti--cooked (break it up into smallish pieces to make stirring and serving a little easier) (even if you normally hate whole wheat pasta, try it! you won't even notice the taste in this casserole)
1/8 to 1/4 teaspoon Cayenne pepper
Salt & Pepper to taste
Some more cheese to sprinkle on the top (if you like cheese overkill)
And maybe 2 cups of the canned cream soup alternative.
Optional: Feel like a better mom by adding in some frozen corn and/or peas and/or broccoli.
Directions:
This is super easy. Just mix up everything except for the cheese that goes on top. Start with all of the dry ingredients, then add the cream soup stuff and stir it all together (I use a really big bowl so that I can stir with wild, reckless abandon) until it seems like you've got enough to make a nice, creamy casserole.
Stick it all in a no-stick sprayed 9 x 13 pan. Sprinkle that extra cheese on top. Bake at 350 for about 40 minutes. Or, if you just made all of the ingredients and they are already hot, it only takes about 20 minutes to heat it through. Then it's time to eat. :) Yum!
I often make extra spaghetti during some other meal and then use the leftovers to make this casserole.
Now I have one and a half quart jars of the cream soup alternative in the fridge, so that will make other meals very easy for the next week or two.
Enjoy! (I'm going to eat now....)
We Haven't Starved Yet
Saturday, April 12, 2008
Labels:
family news,
Food,
Supermom Says
So we've been working on our No MSG quest (we meaning, me, myself, and I--of course!) for a few days now and I am happy to report that nobody has gone hungry.
I have been able to relax a little bit, going ahead and using up the regular foods that we already had opened pre-quest, even though they aren't perfect. I figure that this buys me some time to just work on finding replacements for the things that we're out of, and later I can work on the other stuff. It is getting kind of routine for the kids to ask for something (ie: right now they are eating the leftover ice cream from a birthday party awhile back) and me to tell them yes, followed by a comment that goes something like this: "Enjoy it because it might be the last time we ever have that in this house." They look at me with some fear at that point, and I just smile and tell them that I'm sure (SURE!!) that we will be able to find a suitable substitute. :)
I did go through my pantry and bagged up every baddy-cat food that hadn't yet been opened, and actually returned it all to the store. There weren't very many of those, fortunately, but what there was I knew I didn't want to use and would much rather have the money to spend on salad stuff. :)
Right now we are in the midst of getting ready for my husband's parents to visit us from out of state, so I don't have the time to share every recipe that we're using to live :) but maybe after that I *might*. (many of them are in my ebooks, anyhow, so probably a lot of you already have those) Big, fat salads are definitely on my food agenda every day, and that makes me feel like I'm taking good care of myself, which is a plus.
In case any of you are wondering if I came up with any brilliant recipes for the bread-gone-wrong, the answer is no. (not for lack of information, I'm sure. Just for lack of time to work on that particular project.) The kids have eaten most of it, some remaining pieces were turned into French Toast for tonite's dinner, and the rest will probably end up as bread crumbs, which is a worthy and noble end for unloved bread. :)
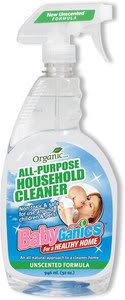
Introducing BabyGanics Family-Safe Household Cleaners
Friday, April 11, 2008
Labels:
Products
 I've enjoyed using various non-toxic and all-natural cleaners in my home for many years. However, the one thing that always bothered me about some of them was that I bought them through multi-level marketing businesses that required me to sign up or pay a yearly membership fee in order to purchase their products. What a drag! Inevitably, I'd run out of my cleaner about a week after my yearly membership was done. Sure, the cleaner was only $12, but I had to pay over $30 to get "in" again. No thanks!
 I'm so glad that I found out about BabyGanics. This company features wonderful cleaning products that are safe for people, pets, and the environment. It is non-toxic, organic, and all-natural.
BabyGanics products have
No fillers
No chemicals
No VOCs
No pollutants
and are Non-caustic.
I've been trying out the products in my home for several weeks now to see if they are any good, and I am happy to say that I can definitely recommend these to you.
There are four different cleaning products available:
All-Purpose Household Cleaner
Glass and Surface Cleaner
Tub and Tile Cleaner
Floor Cleaner Concentrate
All four products come in either unscented or lavender scent.
Making Lemons Into Lemonade, or: What to do when you don't make the bread right.
Labels:
Food,
Supermom Says
So today my daughter asked me to bake bread. I baked my own whole wheat bread for years, then when Life Happened I switched to whatever was healthiest at my grocery store (Baker's Inn). Then I started making the effort to drive 45+ minutes to Great Harvest bread where I can get honey whole wheat that is freshly baked every day. I would get about a month's worth of bread at a time, and stick it in the freezer.
Well, we're down to the end of our supply, so my daughter suggested I bake. I'm still trying to use up some bargain organic milk that I picked up last week at Kroger (I got a whole gallon of Horizons organic whole milk for about $2.69. Then I watered it down about 50% to get an even bigger bargain. Though we don't often use milk, I decided to take advantage of that deal, and I've been looking for ways to use milk ever since. (nobody here drinks milk, so it all goes into recipes)
It has been so long since I baked my own bread that I had a hard time remembering the recipe. Finally, I got it all done, baked, and when pulling it out of the oven I realized that I FORGOT THE HONEY! Wah!
Yeah, 100% whole wheat is better for you. But I was really looking forward to that honey whole wheat.....
I had to leave the house right after taking the break out of the oven, and while driving I realized that even if nobody liked the 100% whole wheat bread, that I could save the day by turning the bread into healthy bread crumbs (just whiz it all up and stick it in a ziploc bag in the freezer) , or homemade croutons or stuffing mix. I'm going to search for some recipes for those since I've never done either one. I'm sure it can't be too hard, though. Right?
Freaking Out About MSG, Part 2
Thursday, April 10, 2008
Labels:
Food,
No MSG,
Supermom Says
Actually, it wasn't all that easy getting out the door to the store. I had no meal plan made. And I didn't have all 5 dozen code names for the dread MSG memorized. So as the kids were making their way out to the Burb, I was at the computer typing out an alphabetized list of what NOT to buy. I could have scanned the page from the book, but the lists in the book aren't alphabetized, which makes it pretty slow going when you're trying to look for something quickly.
So, got that typed, printed it out, and got in the car. The kids asked about the list, so I broke the news to them. We probably weren't going to be buying all of the usual stuff today. Instead, we'll be reading labels. Lots and lots of labels. And trying to get stuff that doesn't have any MSG (or cousins) in it.
(I thought you might like to have a copy, so here's your What Not to Buy if You Want to Avoid MSG list. Either right click and then save target as, or regular click to open, and then just save it as you would for any other Word document. :) )
At the grocery store they were really good sports about the whole thing. We went to our first normally purchased item. "Let's look at this one! I bet we won't be able to get any of that." one kiddo said. Yep. Sure enough. Baddy cat ingredients were all over that stuff. gah.
On we went through the store, making our choices as carefully as we could.
Since I wasn't prepared to go completely cold turkey on this venture, I did still get some things that weren't ideal. Mainly I wanted to get a feel for what we definitely couldn't get if we wanted to completely avoid glutamates, and what was left. :)
I had to have several pep talks with myself. "Baby steps!" "You don't have to be 100% perfect 100% of the time!" "Do what you can, when you can!" It's VERY hard to feel relaxed about eating when you're concerned that MSG is killing off brain cells in your family members. You know? but I did my best.
Mid-way through the shopping trip my kids were looking in the cart saying, "NO WAY can we possibly live off of this amount of food, Mom! It isn't possible." I assured them that we would not go hungry, and that we would just get what we could figure out for now,and if we have to come back to buy more food in a few days or a week, we will. They realized that I've never failed to keep 'em fed, so they were pretty calm about it. :)
By the end of the walk through the store they were actually really, really excited our experiment. They love it when I bake, and I haven't done a whole lot of that lately. I used to bake with my children probably every single day, and that had definitely fallen off the schedule as other things have gotten busier.
We had some good finds at the store as well. Things we were able to buy as usual included:
whole wheat pastas
Kashi cereals (Heart to Heart, and Autumn Wheat)
unsweetened applesauce
I bought extra baking supplies since I plan to try my hand at making homemade crackers and other bread items. We also bought more produce than usual since we at least do know what to do with that. :)
Since I'm sure I'm not the only one interested in this topic, I'm going to try to keep blogging about it here when I have stuff to share. I plan to share recipes with you that worked well for us, plus anything else that comes up that's blog-worthy. :)
I am thinking about offering the MSG Myth book here in the store. Let me know if you're interested.
Freaking Out About MSG
Wednesday, April 09, 2008
Labels:
Food,
No MSG,
Supermom Says
I have had a hard time following my own advice this week.
In one of my books and in my online classes I tell people about The MSG Myth web site. I have done some reading there in the past, but recently a blog post somewhere else got my interest up about trying to cut MSG and other glutamates out of our diet.
I order the book from the site and received it the other day. Oh. Boy. This book is about an inch thick, and starts by explaining to you what's so bad about MSG (and, boy is it bad!), then tells you a whole bunch of ingredient names that basically equal MSG. And by the time you get through a quarter of the book you start having that feeling like, "What on earth are we going to be able to eat?!?!" (And also, of course, the freaking out when you feel an urgent need to change your eating habits, but it feels very, very hard.)
Thankfully, (THANKFULLY!) probably half the book is recipes. And, they aren't weird recipes. Nothing scary looking. Nothing I can't pronounce. Basically, the recipes gave me hope because I could see that the biggest part of avoiding MSG and other glutamates is simple baking and cooking from scratch. Kind of a no-brainer, I guess. But it encouraged me that I could find a way to do better in this area.
Of course, it was grocery shopping time again. I was right in the middle of reading the book and didn't want to buy anything until I had some sort of plan. (Perfection Paralysis, of course!) We managed to squeak by on what we had on hand for a few more days until I couldn't put off shopping any longer. So, even though I had no plan, off to the store I went.
(come back tomorrow for part two in the MSG saga! :) )
Bee Strong Testimonial
Monday, April 07, 2008
Labels:
Customer Testimonials
I am so excited! This gal just ordered her Bee Strong late last week, and already has it and is seeing amazing results!
Although I know that *I* love my products, it always thrilled me when my customers end up loving it too.
You can read her blog post about Bee Strong here
Although I know that *I* love my products, it always thrilled me when my customers end up loving it too.
You can read her blog post about Bee Strong here
Getting Rid of Ants
Saturday, April 05, 2008
Labels:
Household Stuff,
Recipes,
Supermom Says,
Tips
We have had an ant problem at our house for as long as we've lived here. (8 years) Every spring they suddenly turn up on the counters, and we fight them until winter. Last year we got so desperate that we actually used ant killer spray around the outside of the house because the problem just seemed to be getting worse.
I wanted to tell you, though, that what we have actually had the most success with is a cheap and easy homemade ant killer.
You just mix equal parts of sugar and Borax, and then sprinkle wherever the ants go. (in a dry location) For a day or two you will see a large increase in the amount of ants coming to eat this stuff up, but very soon thereafter it'll slow way down to nil.
I like this method so much better than a lot of other options. It's easy to make. I don't worry about it around the kids. (although I wouldn't use it around babies or little ones that aren't old enough to know to leave it alone) For now, it makes for great entertainment for my 5-8 year olds who like to watch all the ants come to eat. :)
Subscribe to:
Posts (Atom)